
 (-1 rating, 1 votes)
ACMA10_3_8-800
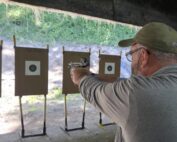
Whether you work for a department having civilians or sworn in charge of your forensic investigation unit, there are certain common denominators throughout the country. Understandably, no matter what the circumstances of an officer’s shooting are, he or she will be justifiably upset, anxious, stressed, or worse. Now, let’s give you a glimpse into the opposite side of the coin, the view from the laboratory and/or the crime scene team.
It’s in everybody’s best interest to understand the scene. Investigators are not there to be part of an emotional sup-port team, or to befriend anyone. This isn’t an excuse for rude behavior, but rather an explanation that we do not — and should not — get caught up in either positive or negative rhetoric. As my dad (a senior forensic scientist) always told me, “We aren’t in the happiness business.” If our word is to be taken seriously and professionally, the competent investigator learns he can’t immediately take any one story as gospel and put on the blinders. So don’t take this personally.
Having worked crime scenes, both fresh and old, in many different places, it’s helpful to have the officer’s and any other person’s accounts as quickly as possible so we can figure out what may or may not be in question. Many departments and unions immediately seclude the shooter(s) and no statements are given. Forensic types like me understand the reasons for this, but from the lab’s perspective, it can hinder the scope of our investigation if we don’t have some critical piece of information the shooter(s) or witnesses might provide.
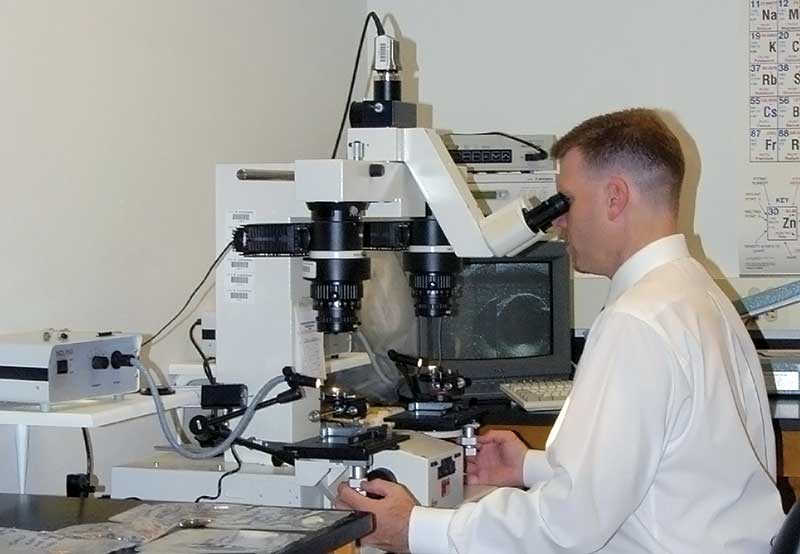
Bigger labs and regional ones of-ten have very sophisticated equipment. Here, a forensic firearms criminalist uses a Forensic Comparison Microscope for a closer look at bullet marks.
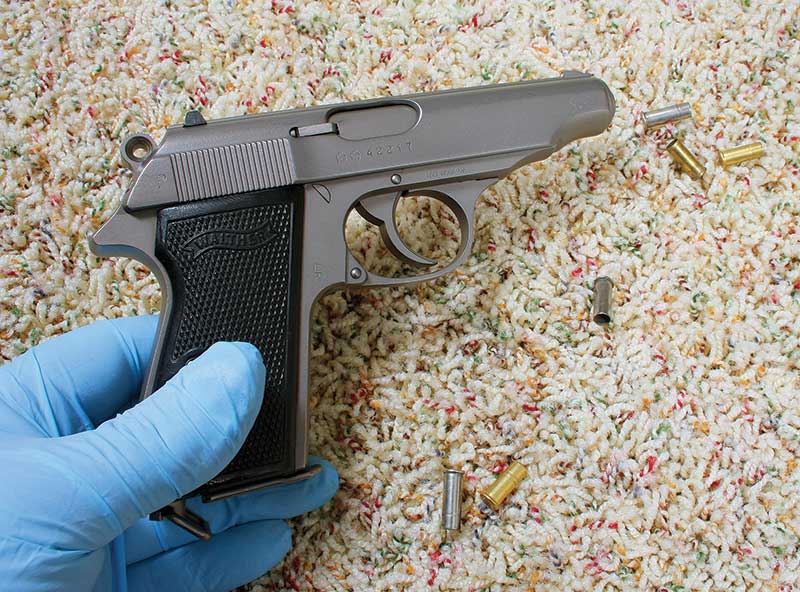
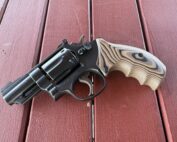
A firearms examiner needs to be familiar with a wide range of firearms, not just common duty-type weapons. This Walther PP in .22 LR is unusual but still needs to be understood.

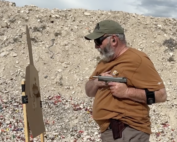
These bullets and cases often have stories to tell. Their careful collection and subsequent analysis can often clear the air on a police shooting incident.
THE SCENE WORK
I’m often asked, “Why are you taking my gun? Where are you taking my gun? When can I have it back?” First and fore-most, a firearms examination will document the condition of the gun upon receipt. This starts with a visual trace evidence scan. Here we’re looking for blood, tissue (close-in shootings), gunpowder particles, oil, dirt and damage. Then we proceed to check the load condition. So, if you reloaded, unloaded or changed your gun condition in any way, say so. It’s not a big deal if you changed the condition after the shooting, as long as we get the correct information.
This can become very important at scenes where you or another responding person may have “made the gun safe” or checked the gun.
As a non-officer involved shooting (OIS) example, it’s better to fess up to having opened the cylinder on a revolver at a suspected suicide, than to deny it and turn a simple suicide call into a homicide call because the fired cartridge casing isn’t under the hammer.
Also, use the correct department ammunition with your gun and spare magazines loaded to the correct level. It’s amazing how many times ammo, reloads or low levels of ammo in a magazine. Tactically, and for the sake of your lab people trying to work the scene, load up! No matter how you do it, standardize how you load. If you top off your magazine, chamber a round and then top off your magazine, stick to that routine.
Back at the scene, examiners will document how many cartridges are in the magazine, if there’s one in the chamber, what brands and types of cartridges are present, if there are any jams, etc. At this point, we’re pretty much done with the gun at the scene. Only in rare cases will an officer’s gun be fingerprinted, as it usually isn’t in question he/she was holding it. If a struggle over the gun took place, then printing will be likely in order to attempt recovery of a suspect’s prints.
Don’t be surprised if the scene team takes all of your additional magazines and ammunition. If gunshot residue exams are required, or ejection patterning, it’s best to use the same batch of ammo for creating test patterns as was used in the shooting. The spares on your belt are our best source. As a side note, it’s interesting how varied the policies are across the country with regard to whether officers are allowed to carry personal guns or department-issued guns only. From the firearm examiner’s perspective, the more diverse the guns are in a shooting event, the better. This goes for ammunition as well. At the scene, if one officer was shooting a Glock 17 with Hydra-Shok ammo, and the other was shooting a SIG 220 with Gold Dot ammo, my ability to quickly and accurately piece the scene together is enhanced, even if all I have is a fragment of a bullet. In this scenario, I would have not only a limited universe of manufacturing styles, but also a very easily discernible difference in the rifling characteristics present on the fragments.
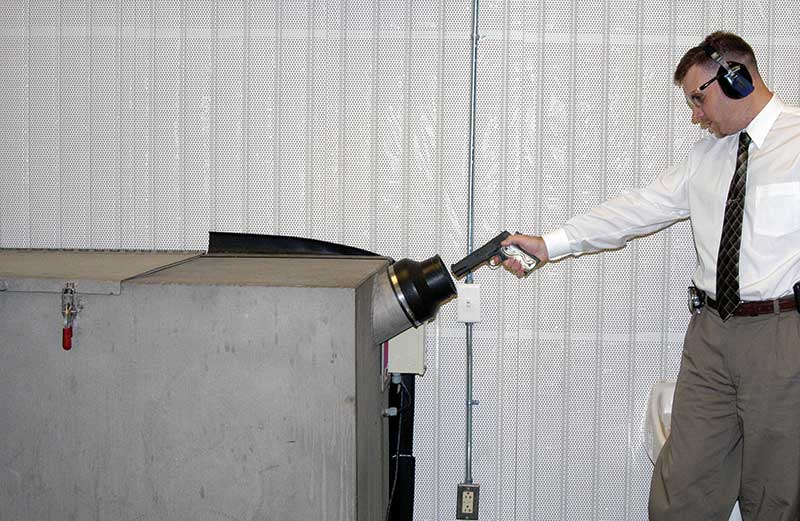
Here, an examiner collects “relatively pristine” bullets by firing into a water tank. These can be used later to com-pare marks on the bullets and cases with ones recovered at the scene.
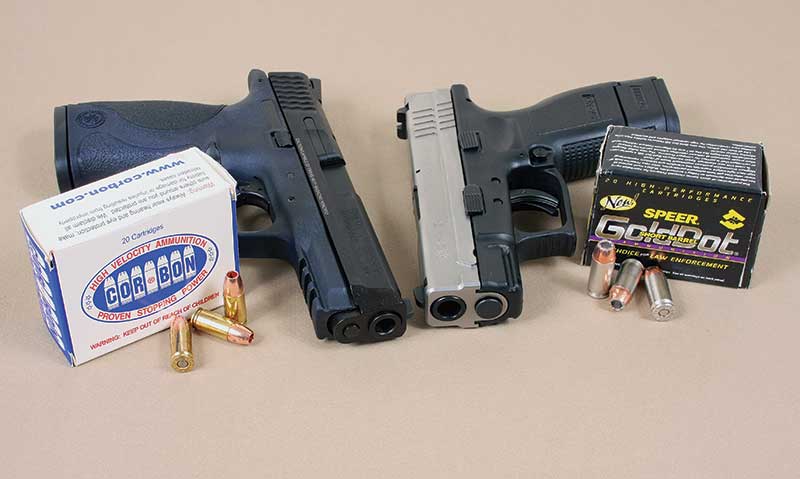
A crime scene investigators’ dream come true here. Two different gun makes, and two different ammunition makes involved in the same scene. According to Mike this makes sorting out what happened much easier than if the cops involved were all using the same kind of department-issued guns and ammo.
THE LABORATORY WORK
The amount of time your lab will keep your gun, if you’re going to get it back, will vary depending on several circumstances. Department policies vary across the country and if you have an issued gun, you may not get it back at all. You may just be issued another one. If the shoot is deemed “bad,” the potential for your gun, department or personal, to be retained indefinitely will of course go up. If gun-shot residue tests or ejection pattern tests are to be done, your gun may be retained for weeks. If the laboratory’s backlog is large, or your department does not have its own lab and receives service from a distant provider, the amount of time the gun may be retained is indefinite. The number of examination types or questions posed about the shooting will increase the amount of time a gun is retained. So you see, there is no one answer.
At a minimum, the examiner will fill out a worksheet on the gun, detailing its physical condition, collection location, mechanism type, brand, model, serial number and much more. Additionally, the work-sheet will document what type of class, or manufacturing characteristics are present on the pistol. For example, common 1911 clones are six conventional lands and grooves, left twist, but not always.
Your firearms examiner will also determine if the firearm is in proper working order. We are required to know and under-stand the working mechanisms of all types of guns. While most of us prefer to shoot your SIGs, Glocks and H&Ks, we also have to be intimately familiar with Davis, Jennings, Bryco, Phoenix, IntraTec — the list goes on. While most examiners do not pretend to have detailed knowledge of tac-tics or how to employ these tools, we do know significant amounts about how they operate, and what the forensic implications of these mechanisms are.
You can absolutely be guaranteed your gun will be test fired. We collect known specimens, or test fires, of cartridge casings and bullets (correct terminology is an article in and of itself) because these are the items we compare to the evidence items and we must be certain they’re from the one particular gun in question — yours. The primary tool used for these comparisons is the Forensic Comparison Microscope, which is really two, high-magnification microscopes bridged together optically into one set of eyepieces so we may see two objects at once.
IN DEPTH
There are several levels of examination the firearms examiner will conduct with regard to tool mark comparisons. First is a determination of whether or not the item in question retains any comparative marks of value. Cartridge casings almost always retain markings, but bullets may fragment on impact with different materials. If the small fragment collected is a portion of the o give, or the curved area leading from the bearing surface (or cylindrical portion of the bullet) up to the nose, it would not have made contact with the barrel itself, and so markings would not have been transferred. Such items would be deemed “unsuitable for comparison.” This is not to say such items are not worth collection or examination. The types of issues raised in shooting events are often not limited to who shot what round. Trace evidence or terminal ballistics may be more of an issue.
The second level of examination deals with class characteristics. All class characteristics must be in agreement from test to evidence for the examination to proceed. Examples of class characteristics for bullets are: caliber, number of lands and grooves, direction of twist and widths of lands and grooves. In other words, there is no way you can have a .45 caliber bullet with six lands and grooves fired from a .45 caliber barrel rifled with five right lands and grooves. Any unexplained difference in class characteristics leads to an exclusion result.
The final level of examination is on the microscopic level and deals with the actual tool marks created on the casings and bullets by the tool, or in this case, the gun. This step often begins with the test firing of the gun into a water tank to gently capture relatively pristine bullets. Casings are collected from the floor. Once these test fires are collected, we will intra-compare them to each other to “learn the gun,” how it marks, what marks are re-producing, and in what quantity.
One gun may leave a unique, striated firing pin drag mark (recoil operated), while another may leave great impressed breech face marks. Not all guns reproduce, and not all guns leave sufficient marks even to identify one test fire to another test fire. Depending on the quantity and quality of these marks, examiners could spend days just looking at known specimens before proceeding to the comparison to evidence. Once we’ve “learned the gun,” we’ll proceed to com-paring the known specimens to the unknowns, or scene items.
If there is sufficient agreement in quantity and quality between the test fires and evidence items, we’ll come to the conclusion of an identification — “This fired cartridge casing from the shooting scene was fired in this particular pistol among all others.” If there are not sufficient markings, we come to a result of inconclusive — “This cartridge casing could be neither identified nor excluded from having been fired in this firearm.” Even if all the class characteristics agree, but there are significant differences in these fine, microscopic markings, we can come to a result of an exclusion — “This cartridge casing is excluded from having been fired in this firearm.” So, even if you and your buddy both shoot Springfield 1911s with the same ammo, we will typically be able, even with a small fragment from the bearing surface of a bullet, to say from which gun it was fired.
ADDITIONAL TIME
There are several types of gunshot residue tests that may be performed. First, a common point of confusion is the difference between primer residue testing, and gunshot residue testing.
By my definition, primer residue testing is the elemental examination, usually using a scanning electron microscope (SEM), for minute particles containing the three mixed elements lead, barium and antimony. This is a well-founded scientific technique, but has limited use in prosecution due to its lack of specificity with regard to the mechanism by which these residues were deposited on hands, clothing or other surfaces. In other words, I can handle a gun that was fired a year ago and get primer residues on my hands.
Gunshot residue testing is also called proximity testing, or distance determination. When a shot is fired, not only the bullet, but sooty/lead residues and partially burned and unburned gunpowder particles emerge from the muzzle. Think of this as taking a golf ball, some sand and some ash in one hand, and throwing them at the same speed. The golf ball will go furthest (the bullet), the sand will go the next furthest (the powder particles) and the ash will go the shortest distance (the sooty residues and lead cloud).
Additionally, just as birdshot fired from a shotgun spreads out in diameter and decreases in density as the “muzzle to target” distance increases, the same goes for these gunshot residues.
For a particular gun and ammunition combination, these patterns are reproducible. However, bear in mind your firearms examiner must create a set of known distance tests with your gun and ammo to find out what these patterns are for that scenario. Once the known standards are created, we can see where the unknown or evidence pattern fits into the bank of “knowns.” Typically, we will not arrive at a single distance, but will derive a range of possibilities for the muzzle to target distance. For example, a result may be, “For this gun and ammunition combination, the muzzle to target distance was greater than 3″ and less than 12″.” This same concept applies to distance determinations where shotgun pellets are concerned. Depending on the caseload of the examiner, it may take days or weeks be-fore the work can be completed and you get your gun back.
CONCLUSION
There are several basic things to keep in mind should you find yourself in the situation where your gun is being collected for examination. Scene and lab people may feel empathy and concern for the officers and their well being, but we have a technical, objective job to do requiring unbiased focus. Don’t mistake professionalism for a negative bias. Most officers would be surprised at the amount of information gained about a shooting by a competent, experienced reconstructionist or firearm examiner. So when giving a statement, be as accurate as possible, without embellishment. Be consistent and correct in your loading practices. Lastly, understand your firearm will be handled in a professional, careful manner while it’s out of your custody.
Mike Haag has spent many years with the Albuquerque Police Department Crime Lab, is an independent consultant, has been a guest on FOX News’ On the Record, and has worked cases across the nation and internationally, including the attempted presidential assassination in Taiwan in 2004. Mike also instructs shooting reconstruction classes across the country and internationally. www.forensicfirearms.com