
 (+6 rating, 6 votes)
featured_3935
A dedicated light mounted on the patrol rifle or shotgun you use at work (or on the same tools you use for home defense) is ideal. My work shotgun had a dedicated SureFire light by 1996. I mounted another Surefire light to my patrol rifle within a year or two.
That said, there are times a handheld light will end up being used in conjunction with the long gun in your hands. Why? I’d venture to guess four reasons.
Why?
First, poor organizational policy. There are still administrators who do not recognize the significance of white light in positively identifying an individual as non-threatening/non-hostile or as a deadly force threat.
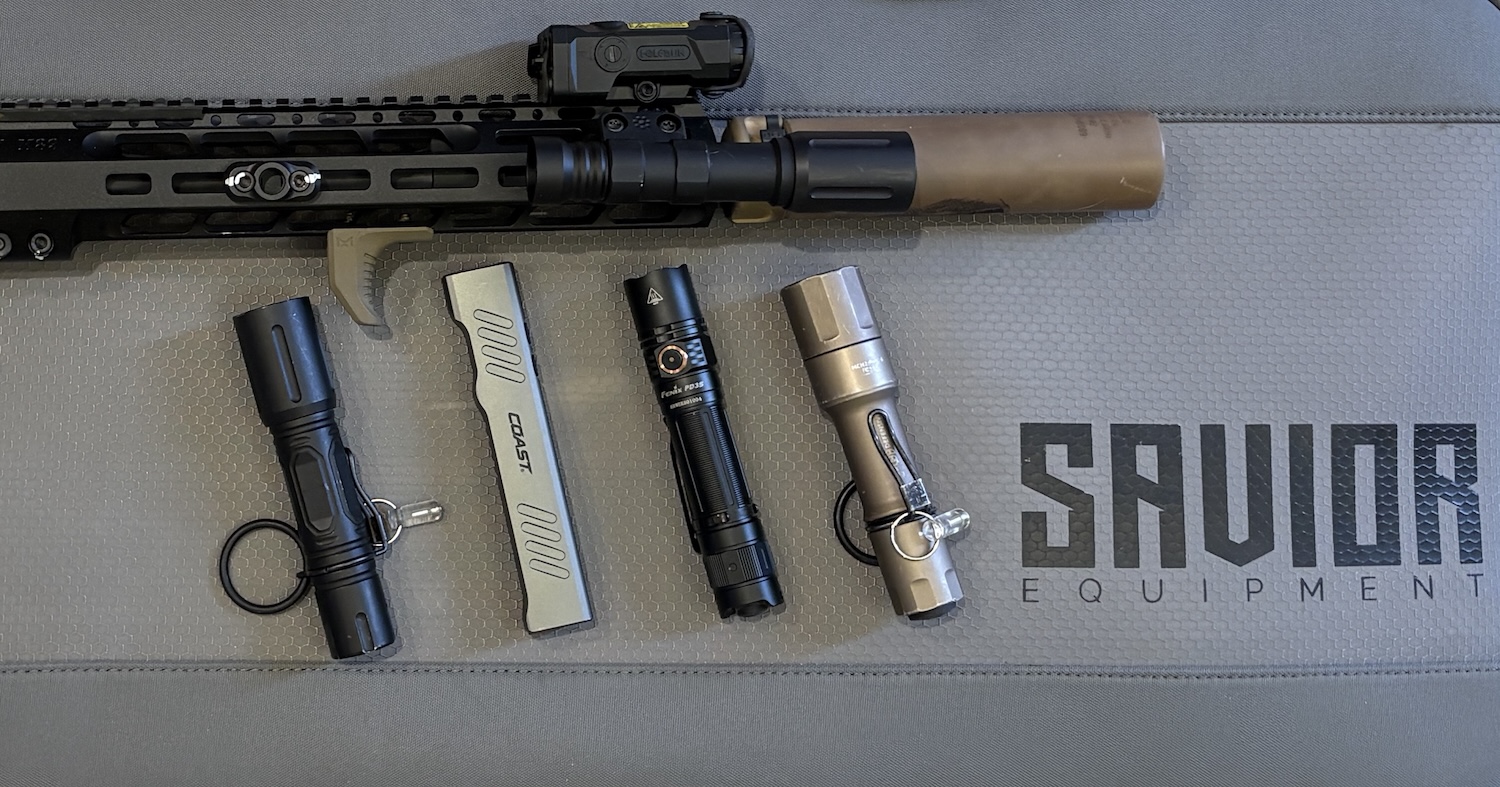
My primary carbine these days – SOLGW 12.5″ upper, Holosun IRIS laser designator & illum, Surefire RC-2 suppressor, and a Modlite – with lights from Modlite, Coast, Fenix, and Cloud Defense.
And there are concerns about officers using the weapon-mounted lights inappropriately, rather than as intended. This can and should be addressed in training.
Failure to adopt lights for either reason may well come back to bite an officer and the agency.
Seconds, cost. Some people, regardless of occupation, may not be able to afford a light and a mounting system.
Third, battery issues. You could have the best light and mounting system known to man. Could. But if you aren’t keeping up on the batteries, you could find yourself in the dark when you most need the light.
Additionally, even with fully charged batteries in the light, if the event goes on long enough, you could run them dry.
The clamp method as viewed when the shooter is in a low ready position.
Finally, equipment failure. I’ve seen mounts fail, and a light has departed the gun. And the older incandescent bulbs would break for no apparent reason.
Those are your whys for potentially needing a handheld light.
Availability
Handheld lights are frequently available when the dedicated options aren’t. So, go to one of those if you need to employ one of these methods.
You could choose either a round or stick-style light.

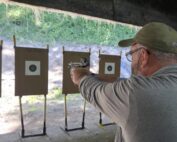
In a recent CMS Low Light instructor Development class, this student is taking Mike Harries’ handheld light technique and applying it to their patrol rifle.
Harries
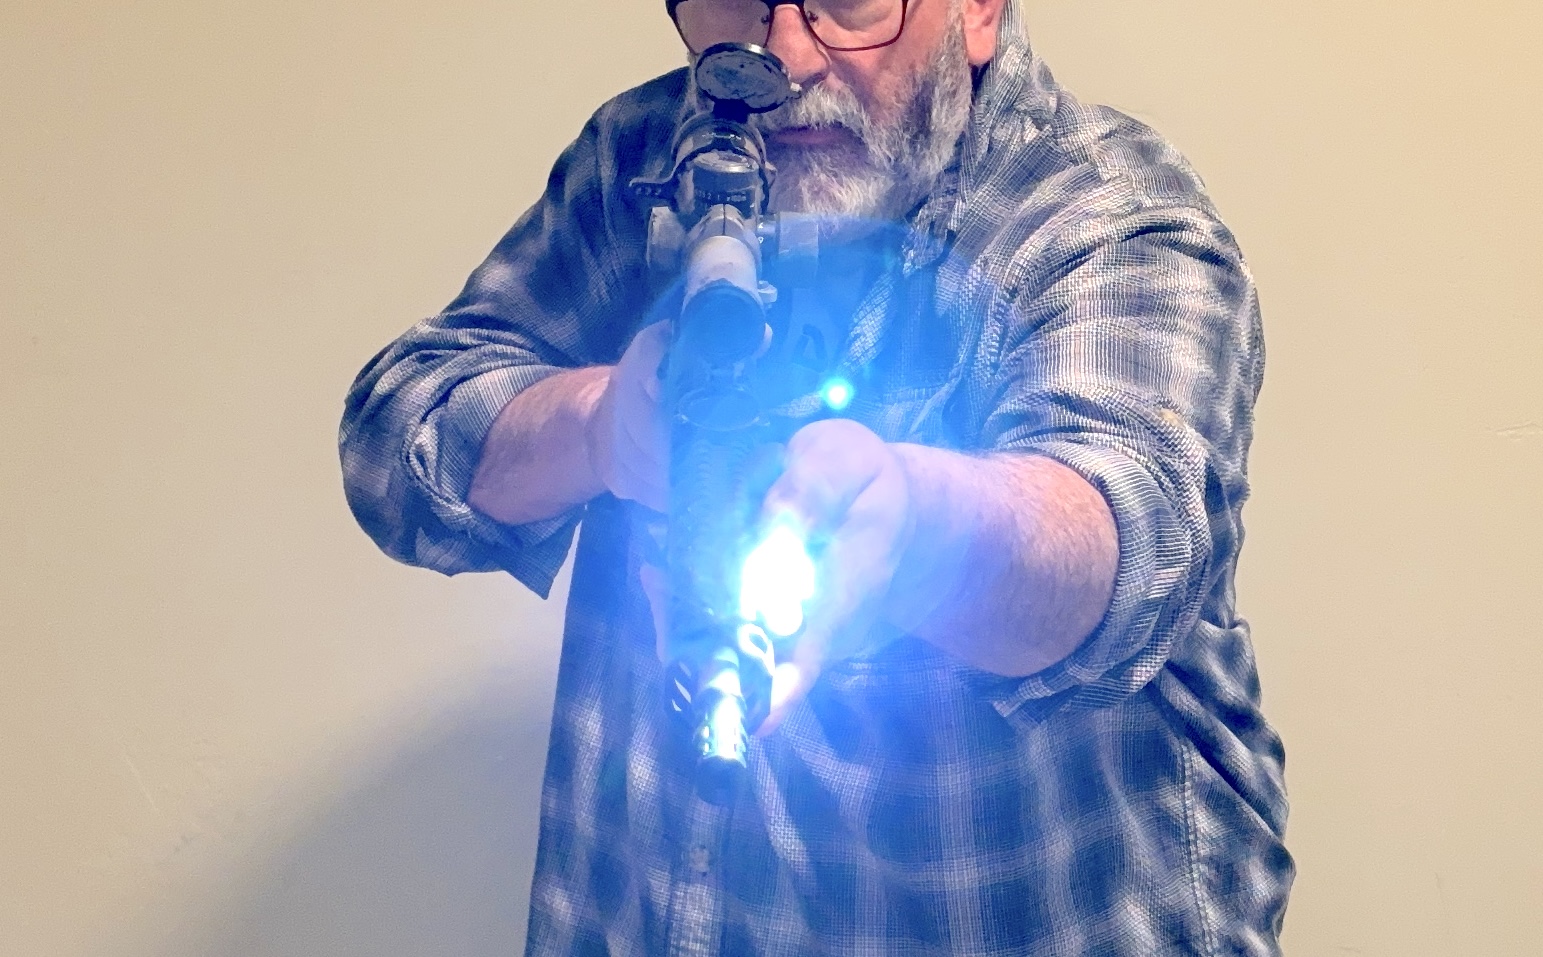
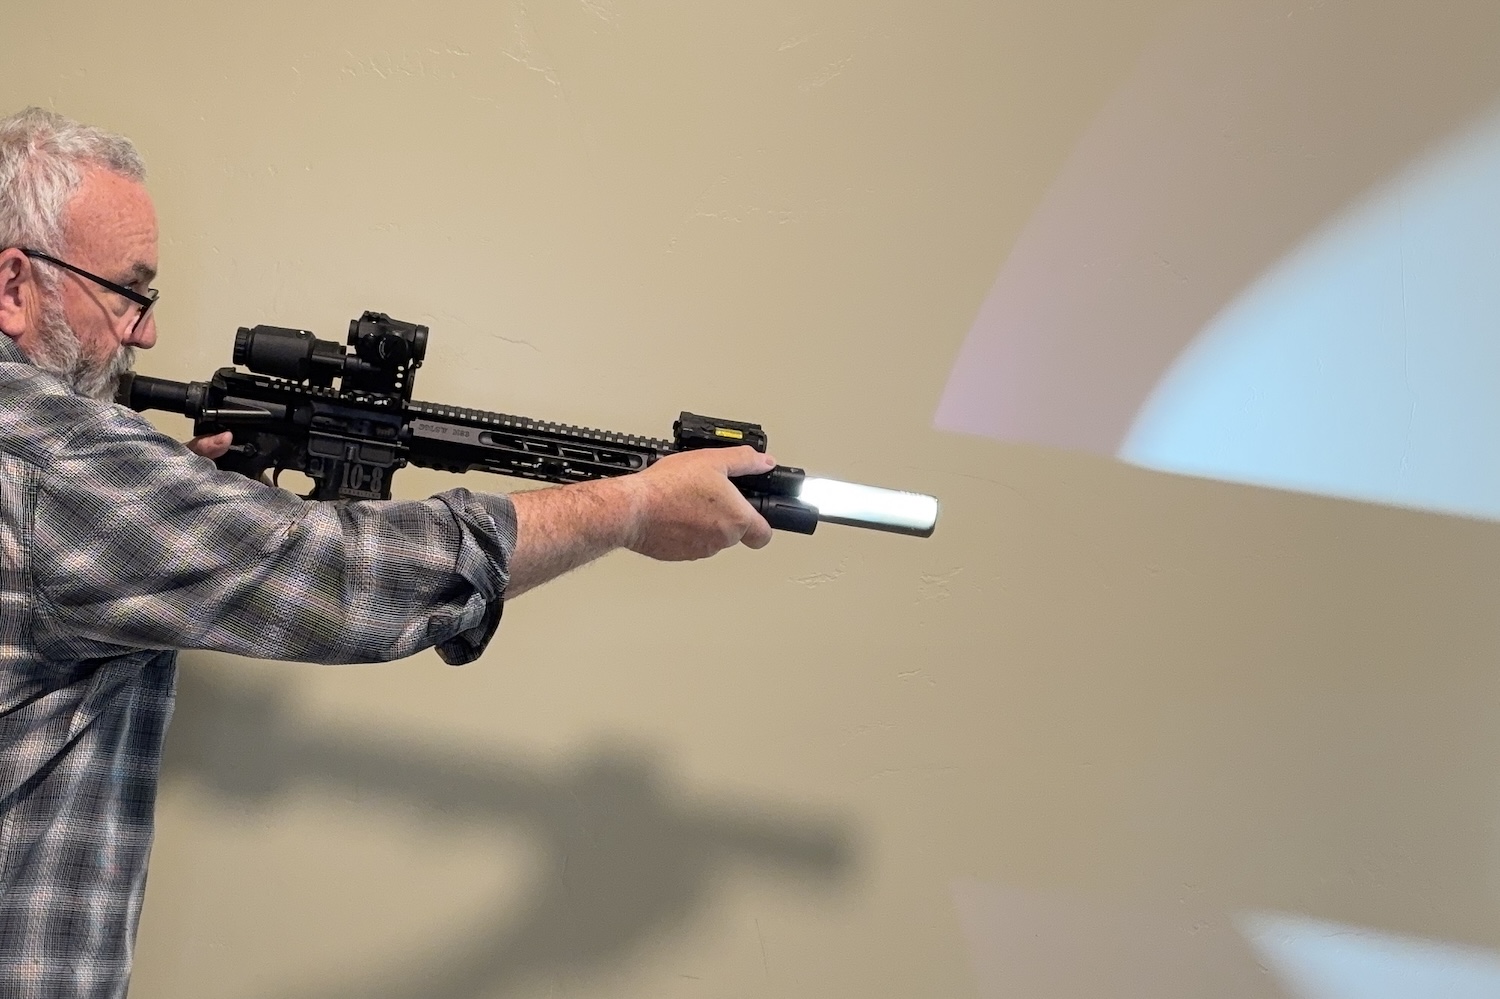
One of the earliest handgun and handheld light techniques was developed by Mike Harries. When he demonstrates it, Harries is generally shown using a multi-cell Maglite. The light is held in an ice pick grip. The head extends out from the bottom of your hand; the rest of the light’s shaft goes past your thumb.
When used with the carbine, the support hand wrist contacts the front of the magazine well and applies backward pressure. You then drive your support elbow downward while bringing the back of your support hand upward and against the rifle’s forearm.
Another look at the Harries – back of the weak hand to the firearm, wrist against the mag well, elbow down.
There is an underrated benefit to this technique. With the muzzle depressed to a low ready or elevated to a high/outdoor ready, the light can be angled forward at waist or chest level. You aren’t dependent on the light’s spill; you can get the hot spot into play without creating a Rule 2 violation.
This also works with a shotgun, though it’s better with a semi-auto than with a pump gun.
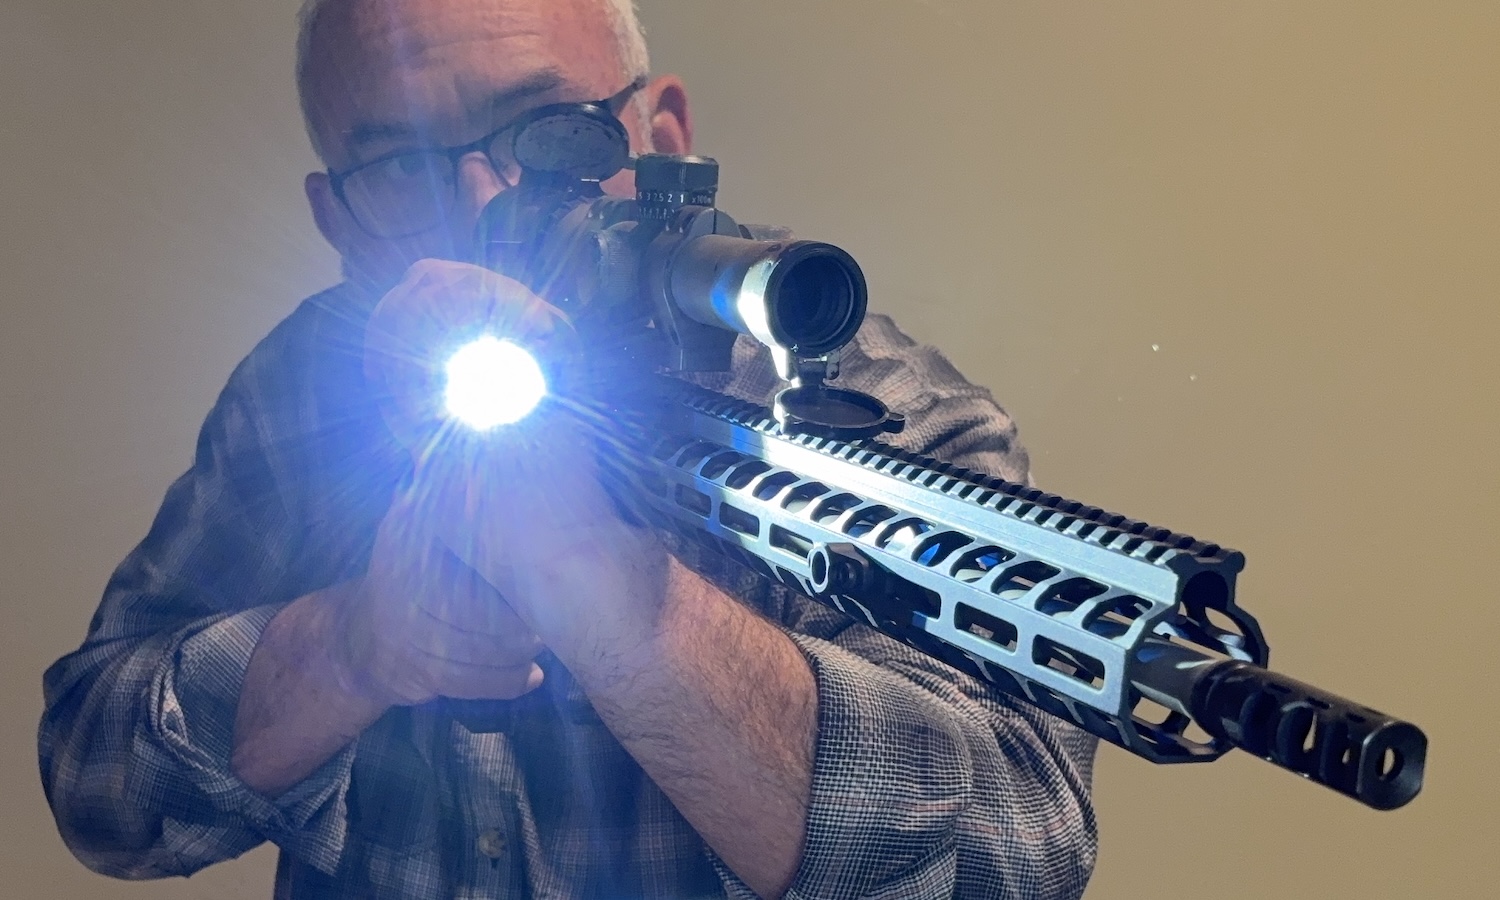
If you don’t have items on the underside of the forearm, you can activate an exposed tailcap with the front of the mag well.
Tail Cap
Not sure that I have ever heard an actual name for this method. It depends on the light’s design; the bottom button must extend beyond the edge of the tail cap assembly. You hold the light with the bulb extending past your thumb and the tail cup protruding from the bottom of your hand.
If there are no attachments on the forearm’s bottom rail, press the bottom button against the magazine well to turn it on. If you have a foregrip or a handstop, you press the tailcap there instead. If your tail cap is enclosed, a hand stop allows you to use this method.
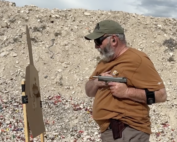
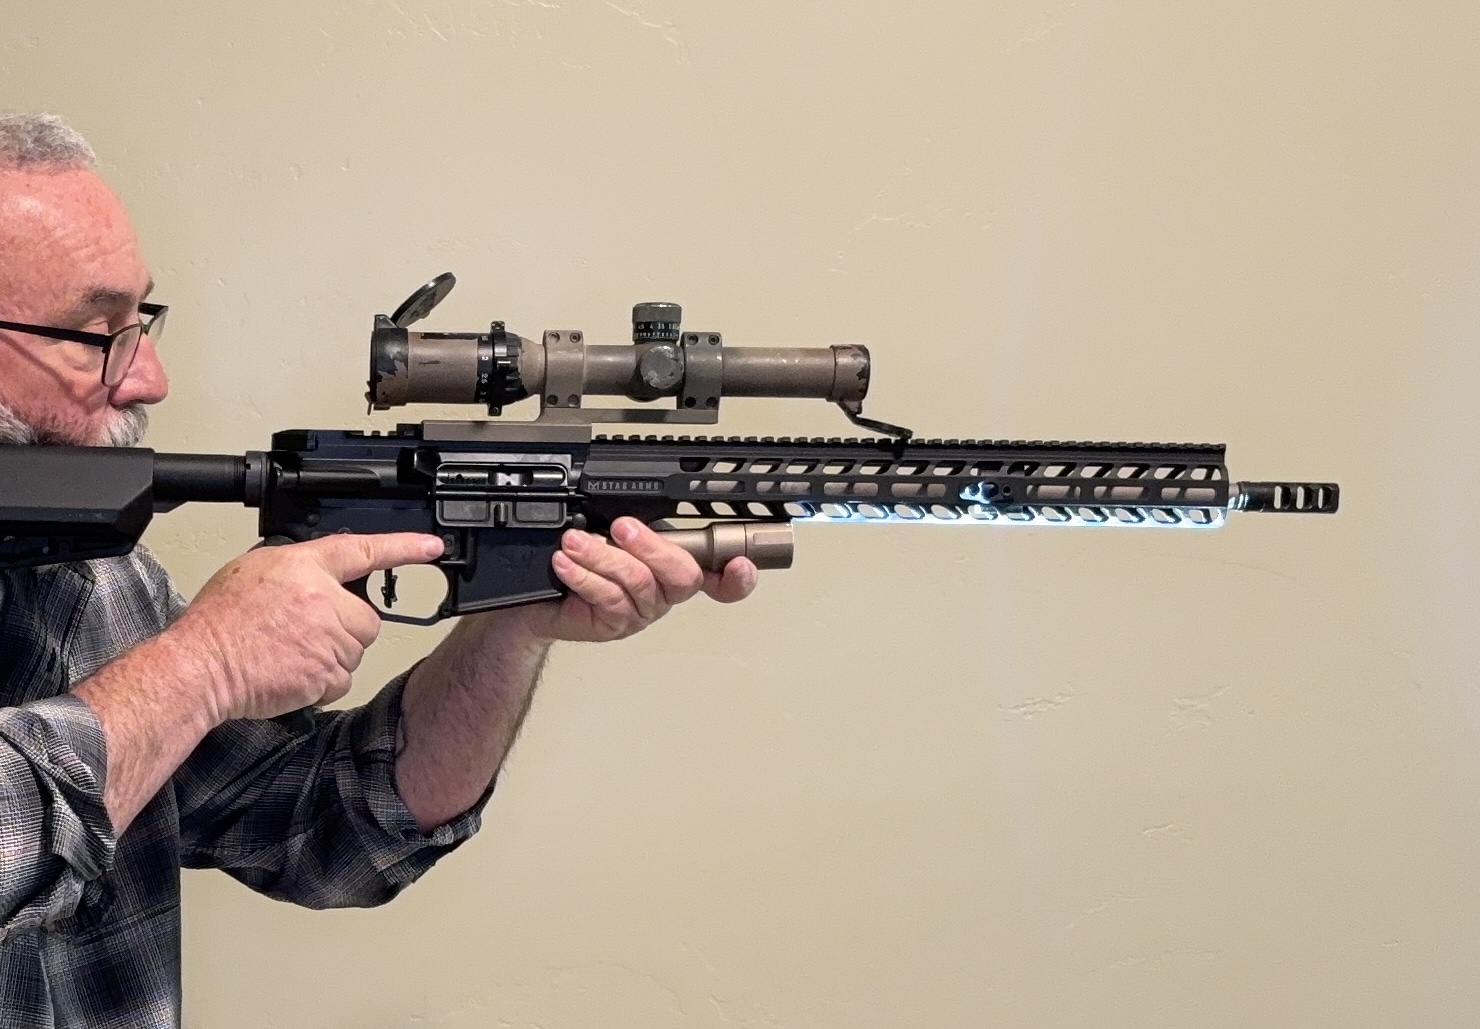
Another look at clamping your handheld light – in this case from Coast – onto the rail with your support hand.
Clamp
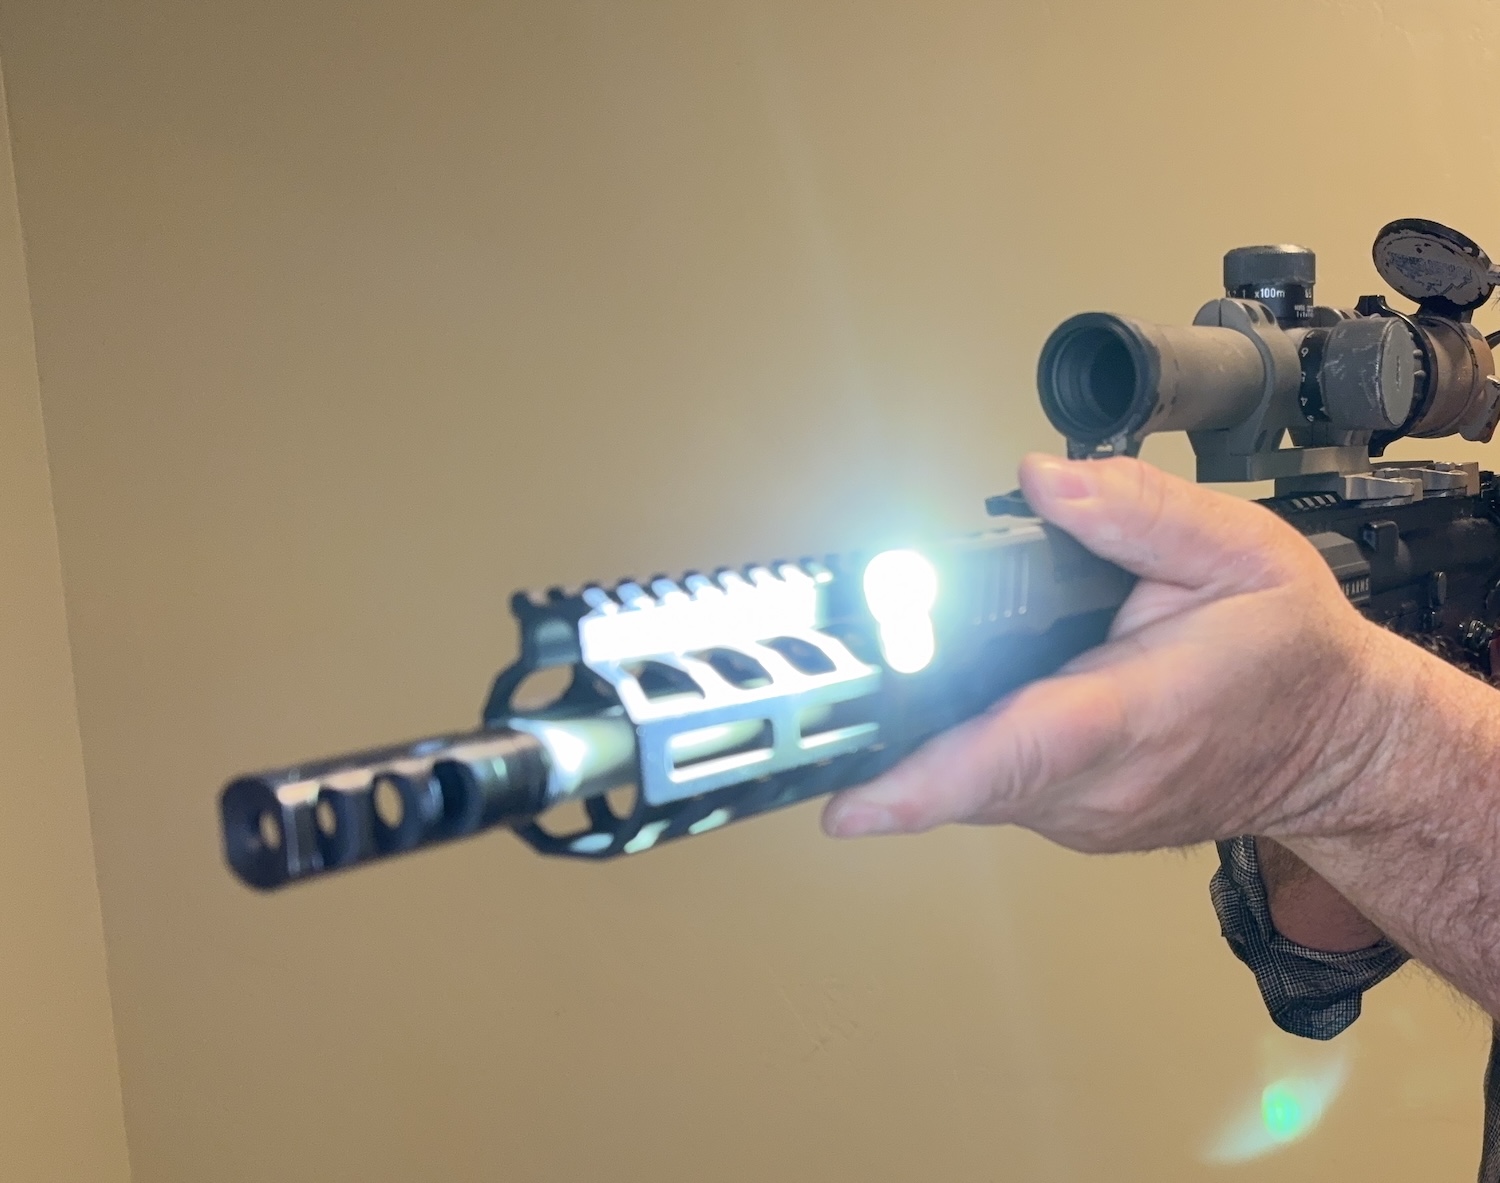
This requires a side button, rather than a tail cap. You’ll hold the light against the forearm, using your fingers and palm to apply inward pressure. Your thumb is on top of the side button to activate it. It works well when your primary weapon light has failed, and you can push the handheld alongside it. Or if there was never a light to begin with, and you can push it into an angled portion of the forearm with the head in front of the leading edge.
If the light that’s already on your rifle goes down, you can clamp a handheld on top of it and continue on.
Final Thoughts
I teach these workarounds in my low-light instructor development class. The students give positive feedback.
None of these is ideal. They are a fallback option when you don’t have a light to begin with, or your weapon-mounted light has failed.
Advocate for competently written policies and better training. -especially in the low light arena since the Courts have mandated it. Save a bit to get a piece of equipment that may well save someone else’s life. Have that handheld so you can use it like a reserve parachute.